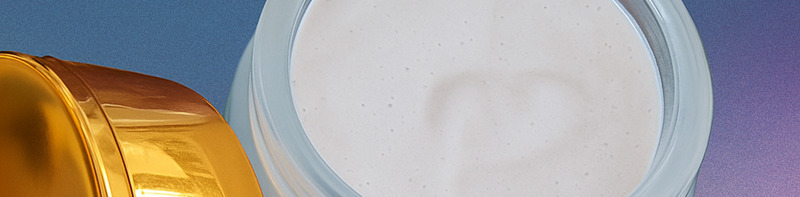
Moisturizing Mousse
There are many steps involved in product development, but my favourite is by far the recipe formulation and the tinkering that follows. However, there are a few steps in the process that need to happen first. I’m going to walk through my process briefly with our newest product - I’m very excited about it, and might be a little obsessed (rightly so, in my humble opinion!).
To start with, the core WHY behind why we even decided to develop a new product to start with. And I’ll get to that in a minute, but I want to go back a little further first. When we started making the peony skincare and beauty products, I always had in mind a luxurious, beautiful moisturiser - a staple in any skincare routine. However, when I first started out, I really had no idea how to make this vision a reality. I lacked the knowledge and the skills needed to even really know where to start. So I started with a simple, and easy to make, body butter.
At least in theory.
It turned out that while the body butter was lovely to use, it was difficult and fiddly and frustrating to make. I wanted something closer to my original vision that was easier to work with, and most importantly, less messy! Cleaning up after crafting is the worst part, and the less mess I make of my work bench the better. But, if I’m completely honest, my confidence was shaken after the disaster that making the whipped body butter had become (it was messy and more fiddly and difficult than I originally anticipated, and I had a drama Queen moment about it 💅👑). This was supposed to be simple and easy, yet I was struggling (the urge to rage quit was strong 😅 but we persevere).
Over time, and with practice, working with the body butter became less of a hassle, but it was still messier and more frustrating than I would like. Although we were getting a lot of great feedback and comments from friends, family, and customers alike who loved the body butter, I still wasn’t completely happy with it (hello perfectionist tendencies, nice to see you again).
Combine all this with my personal preferences for a lighter feeling moisturiser, the itch to create something new and different grew. Body butters are incredible moisturizers, locking in nutrients and goodies for your skin, but they tend to sit a lot heavier on the skin, and be quite slow to absorb. These can be great qualities, and for really dry areas (for me this is my elbows and feet) they are great, but for everyday use I prefer something lighter and fast absorbing.
So to quickly summarise the reasons why we started developing this product:
- The body butter wasn’t working for me, and I wanted something less messy.
- I wanted to make a lighter moisturiser, something closer to what I would use as part of my regular skincare routine.
- It's off-season, daily work is slower, and I wanted to see if I could (this motivation sometimes gets me into trouble…).
With these reasons in mind, to Google I went! I admittedly fell down a bit of a research rabbit hole, but emerged with a clearer idea of how to achieve what I wanted (YouTube is a great teacher, cannot recommend highly enough). Armed with a little bit more information, and a basic understanding of how to make an emulsified moisturiser, I got to work.
My favourite part: Formulating the recipe
Step One: Research ingredients and their properties. The joy about working with botanical and natural ingredients is that they are so complex and absolutely chock full of compounds and enzymes that can provide countless nutrients and benefits for our skin and general wellbeing. Did you know that a single flower can have over 500 compounds in it? How epic is that?! Broadly speaking, I kind of categorise ingredients into 3 categories: active botanicals, functional or structural ingredients, and aesthetic/fragrance/flavour ingredients (some fit into all 3 categories!). If we go through the ingredients that were chosen for the mousse, I will highlight some of my favourite things about them and why they made the cut over other potential options. If you’re interested in this, and my ‘deep dive’ into the ingredients - Click here.
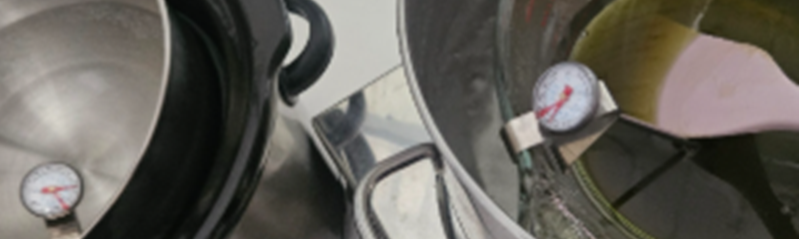
Step Two: Make sure your use rates, interactions, and methodology is sound. Each ingredient has its own properties, compounds, and nutrients, and it's critical when coming up with your recipe that these are all taken into account. For example,
- some ingredients have a maximum safe use rate (like Vitamin E)
- or a way they interact with other ingredients (such as water, oils, and emulsifiers)
- temperatures they need to be used at or incorporated at to ensure they keep all their precious botanical benefits and the nutrients aren’t burnt off.
When working with natural botanical ingredients, most of the time they have a maximum temperature threshold they can tolerate before they degrade. This must be taken into consideration, especially if you are also working with waxes or solid oils that need to be melted before they can be blended with other ingredients. Your timing, when you include each ingredient, and the order in which they are used is important.
It is much easier to have all of this worked out before you try to actually make the product. Trust me, learn from my mistakes; having all the research done and especially the order of operations clear in your head (or written down is even better!) is key.
Step Three: Try the recipe and see what happens. Once you have your ingredients selected, your method solid and planned out, the obvious next step is to try it out. In all likelihood, your recipe won't be perfect the first time and will require some adjusting until you get a final product you are happy with.
Step Four: Refine, Refine, Refine!! You just have to keep adjusting the recipe, ingredients, and method until you get something you are happy with. However, the most important part of this part of product development is WRITING IT DOWN!! It is so important to keep written documentation of exactly what you have done - if you end up with a version you really like, but didn't write it down, how are you going to replicate it?
The first version of the moisturising mouse was very very runny, and the first thing I changed was to adjust the ratio of wax: water, using a bit more wax to make it more solid and a little less hydrosol. I tend to keep working in small batches, 50-150 grams at a time, until I find a version of the product that I like, and then once I get to that point, I make a bigger batch with the intention to give it to friends and family for feedback, and then more tinkering based on that.
Step Five: Collect feedback from others, and continue to refine. I have a small group of friends, family, and co-workers who I ask to product test all of our new stuff - I even have feedback forms and a (few) spreadsheets. The more feedback I can get, the better - and everyone loves a cheeky freebie and a chance to share their opinions. Based on this initial feedback, the recipe is refined even more until we get the final product.
Step Six: Launch! Once the product is refined as far as you want it to be, it's time to launch and let the customers get their hands on it. I like to do a sort of soft launch at the Moutere Artisan Open Days, which is a local event held twice a year where Artisans in the Upper Moutere area open their workshops, farm gates, kitchens, homes, galleries etc. for the public to get a peek behind the scenes and get to know more about what’s going on in their area - it also makes a great holiday activity (they are held on the Sunday after ANZAC day, and the Sunday of Labour weekend; go to https://www.moutereartisans.co.nz/ for more information).
Then it is time for us to launch it on the website for the general public. We are at this point now with the moisturising mousse - we even have a special deal for our website launch.